How to Take Photos for Custom Caravan or Motorhome Graphics
If we don’t already have your caravan or motorhome’s design on file, we’ll need to trace your existing graphics from photos.
To get the best result, please follow these steps carefully — accurate photos make all the difference!
- What We Need
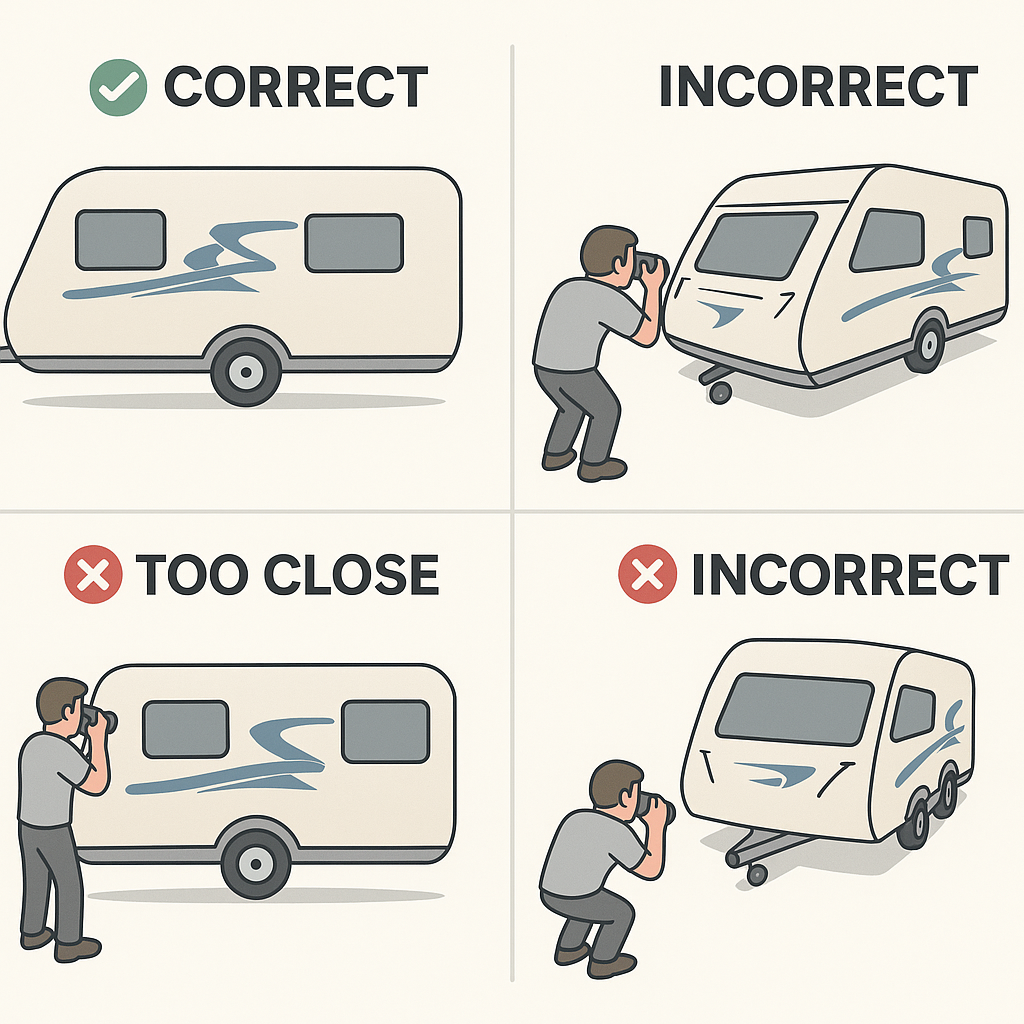
- A clear, side-on photo of each side of your caravan or motorhome that has graphics.
- Make sure the photo is level and taken parallel to the side (not at an angle).
- Take the photo from far enough back so the entire side fits in the frame.
- Keep the camera at roughly the same height as the centre of the vehicle (not too high or too low).
- Step-by-Step Guide
- Park on level ground – This helps keep the photo straight.
- Stand back 5–10 metres (or more for larger vehicles).
- Hold the camera at chest height, aiming directly at the middle of the side.
- Make sure the vehicle fills the frame, but don’t crop the edges or cut off parts of the design.
- Avoid angled shots – the side of the vehicle should look flat, not tapering away.
- Check the photo – if it looks “stretched” or “leaning,” retake it from a straighter angle.
Common Mistakes to Avoid
- Taking the picture from a corner (creates distortion).
- Standing too close (makes proportions inaccurate).
- Tilting the camera up or down (changes the shape of the design).
- Using wide-angle phone lenses up close — step back to reduce distortion.
- If the image is low resolution or copied from the internet it may not be suitable
PLEASE BEAR IN MIND IN BUSY TIMES WE MAY NOT BE ABLE TO ACCOMMODATE ALL REQUESTS FOR CUSTOM GRAPHICS, IN PARTICULAR DURING THE SUMMER SEASON